In Recipes

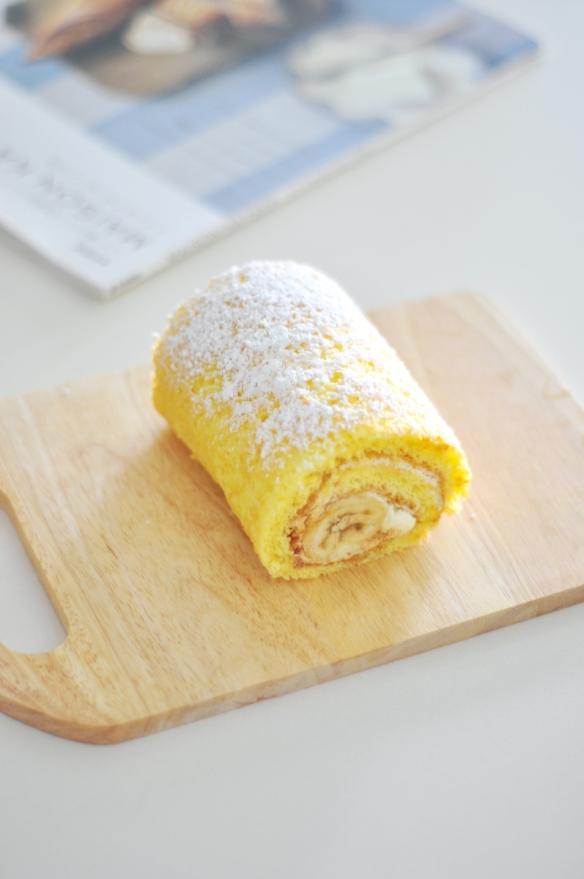
recipes: banana salted caramel roll

DSC_0217 copy

I’ve been a on a lookout for a good basic sponge recipe for roll cakes. This search saw me trying out and tweaking various recipes.

DSC_0223 copy

This recipe was adapted from one of my favourite cookbooks, Okashi: Sweet treats made with love. In general,  roll cakes (or swiss rolls) are fairly simple and quick to make. It is essentially just a layer of sponge cake and cream.  The sponge, which can be made in under 30 minutes, is filled with a layer of cream and rolled up.

This particular roll cake requires an additional step – the making of salted caramel.  The combination of salted caramel and banana was good. But I was rather disappointed with the sponge cake.  Although it was sturdy enough to roll and light in texture, it tasted a little too ‘eggy’ for my liking. I love sponge cakes that are cottony soft and with almost non-existent cake ‘pores’. The cake may have scored well with those who have tried it, but it was not what I was looking for.

With that said, my hunt for the perfect sponge has ceased ever since I discovered an amazing recipe (which will be up soon, hopefully).

DSC_0226 copy

Components

  • Swiss roll sponge cake (1 quantity)
  • Ripe bananas
  • Caramel cream
  • Whipped cream

Caramel cream

  • Castor sugar 50g
  • Whipping cream (35% fat) 50 g
  •  Fleur de sel, to taste

Whipped cream

  • Whipping cream (35% fat) 120g
  • Castor sugar 1tsp

Basic Swiss Roll Sponge

  • 3 large eggs
  • 60g superfine granulated sugar
  • 50g of sifted pastry flour (top or cake flour is fine)
Steps for Swiss Roll Sponge
Preheat oven to 200 degree celsius. Line a 28 x 28 cm flat square pan with parchment paper.
Using a clean bowl, beat eggs with a whisk. Add sugar, then place bowl over a simmering water and mix well.
When egg mixture is warm, use an electric mixer and beat on high speed until light and fluffy. Reduce speed to low and continue beating for about 1 minute (reducing speed to low will help stabilise the batter and to remove giant air pockets). Gently fold in flour with a spatula.
Pour batter into prepared cake pan and spread evenly. Place cake pan on a tray and bake for 10-13 minutes (placing the sponge on an additional tray prevents the bottom from browning too quickly).
When sponge is done, remove from pan and place it in a big plastic bag to cool (this helps retain the moisture of the sponge).

Steps for Caramel Cream 

Place sugar in a saucepan and heat until it caramelises. Carefully pour cream into the saucepan while stirring slowly with a spatula (it will bubble). Mix until smooth. Leave to cool.

Steps for Whipped Cream
Combine whipping cream and sugar in a clean bowl (you may want to freeze the bowl beforehand). Using an electric mixer, whip cream at medium-high speed until stiff peaks form but cream is still smooth. Be careful not to overmix.
To assemble
Turn cooled sponge onto a clean work surface. Peel off parchment paper from bottom of the sponge. Spread an even layer of whipped cream over top of sponge. Peel and trim ends of bananas, place on one edge of sponge. Drizzle caramel over bananas, then gently roll up sponge starting from side with bananas. Wrap with cling film and chill in freezer to set. Slice to serve.
Tips:
Use other types of fruit, fill it with some whipped white chocolate ganache instead or add a vanilla bean pod into the whipped cream.
Share Tweet Pin It +1

You may also like

recipes: matcha roll cake

Posted on March 24, 2014

Beauty tips: Koplina for beauty and health

Posted on September 28, 2014

[Food] Fetish Matcha at Antoinette

Posted on May 28, 2016

Previous Postyuzu ogura cake
Next Postpantry staple: basic crêpe recipe
  1. Apartmani Dobre Vode
    12 years ago

    Looks very,very good.

    1. vickiima
      12 years ago

      Thank you for your kind words!

  2. z
    11 years ago

    may i know which whipped cream did you use? thanks!

    1. vickiima
      11 years ago

      Hi, I use Emborg for convenience but I highly recommend Elle de Vire – it’s the best that is available in Singapore. You’re welcome!

Spice up your brand with VICKII STUDIO Show me more